Students

Student Manual
How to Login?
Step-by-Step Student Login:
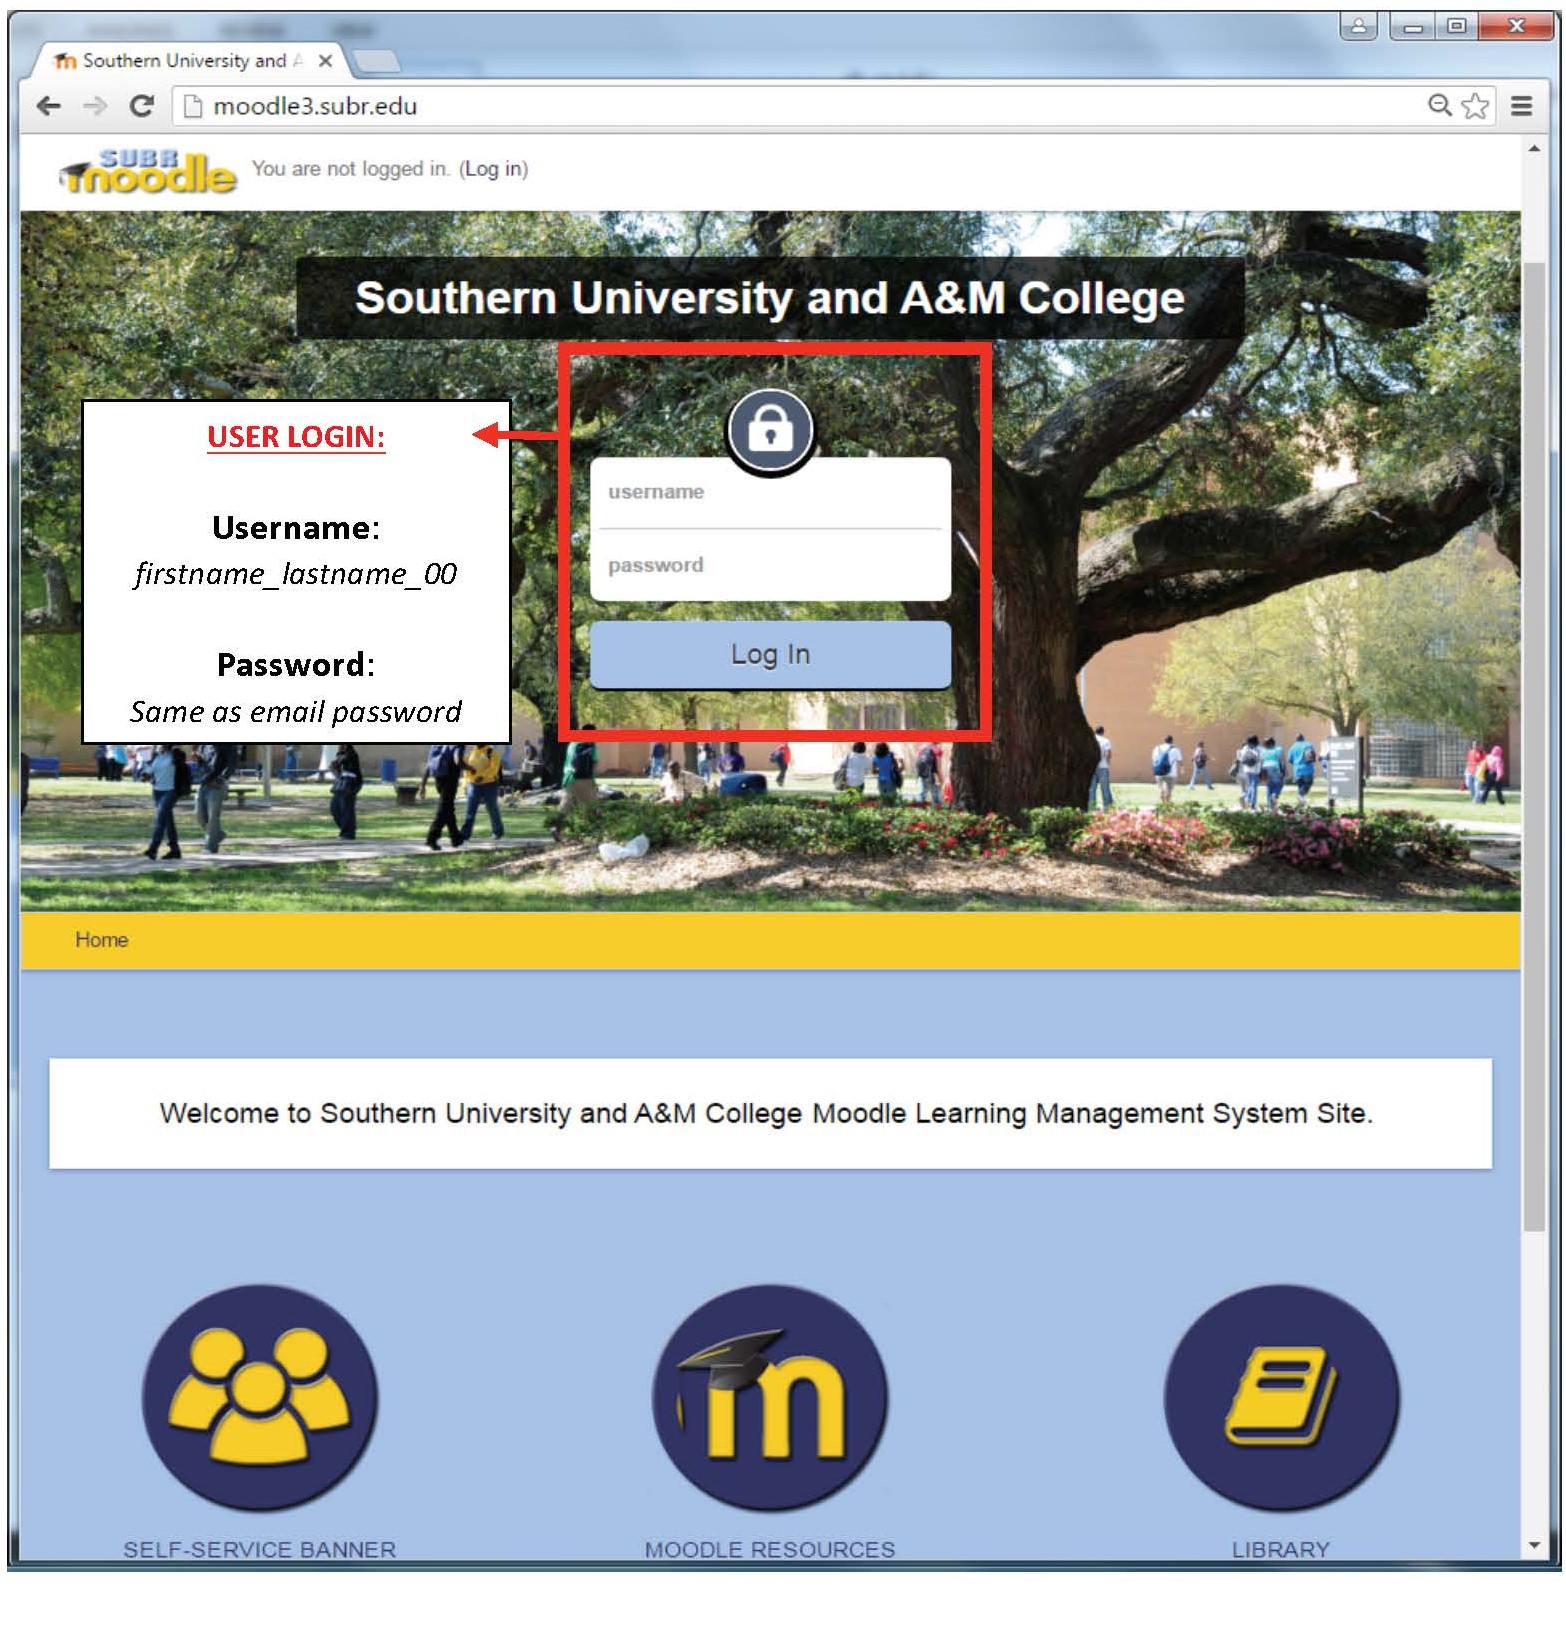
To begin the login process, first navigate to the SUBR Moodle Site, moodle3.subr.edu. Your screen should look similar to the screenshot above.
- To proceed, locate the username and password field outlined above in red.
- Type in your username and password. Both required fields will be the same username and password you use for your SUBR Email account without the “@subr.edu”.
For Example, if your email address is jane_doe_00@subr.edu, then your username is simply, “jane_doe_00”.
- Now, click the “Log In” button.
Accessing Your Courses:
Step-by-Step Accessing Your Course:
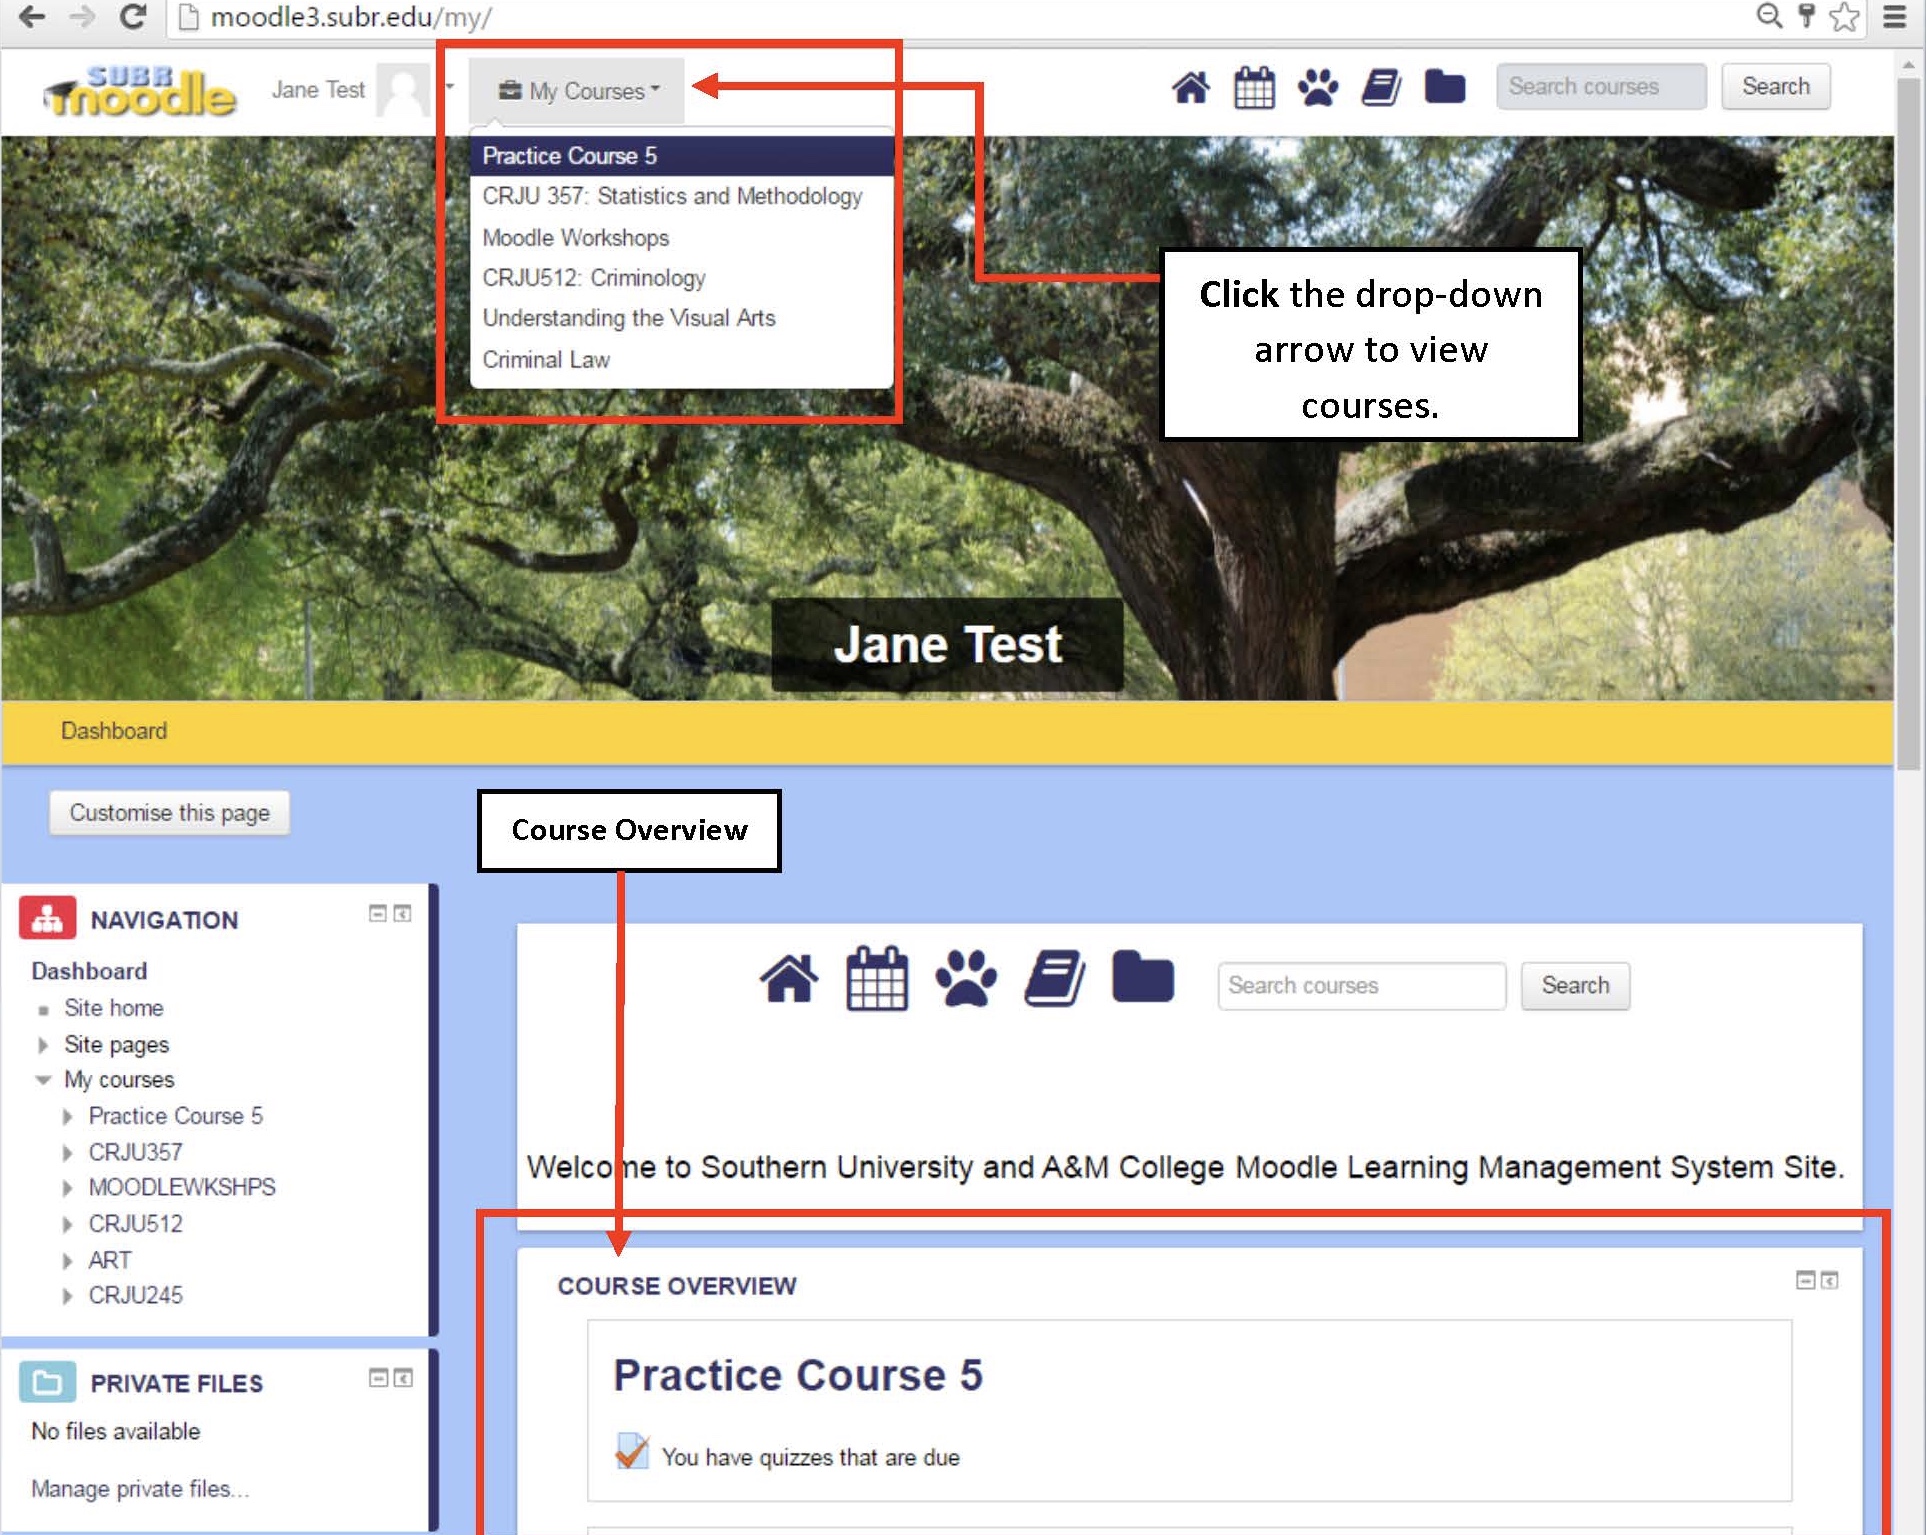
To begin viewing courses, login into SUBR Moodle Site, moodle3.subr.edu. Once logged in you will be directed to the site Dashboard Page. There are two ways to view your courses: “My Courses” drop-down menu and “Course Overview”.
- To proceed, locate “My Course” drop-down menu on the top of page outlined above in red.
- Click, the drop-down menu arrow that’s located to the right of “My Courses” menu to view courses.
- Highlight and Click, the course you would like to access.
Viewing/Uploading an Assignment:
Submitting an Assignment you will be required to submit a number of assignments throughout a term. To ensure that you receive proper credit for your assignments, please follow all instructions given to you by your instructor.
Step-by-Step Uploading an Assignment:
To begin uploading assignments, you will need to go into a course. (Please read Step-by-Step Accessing Course)
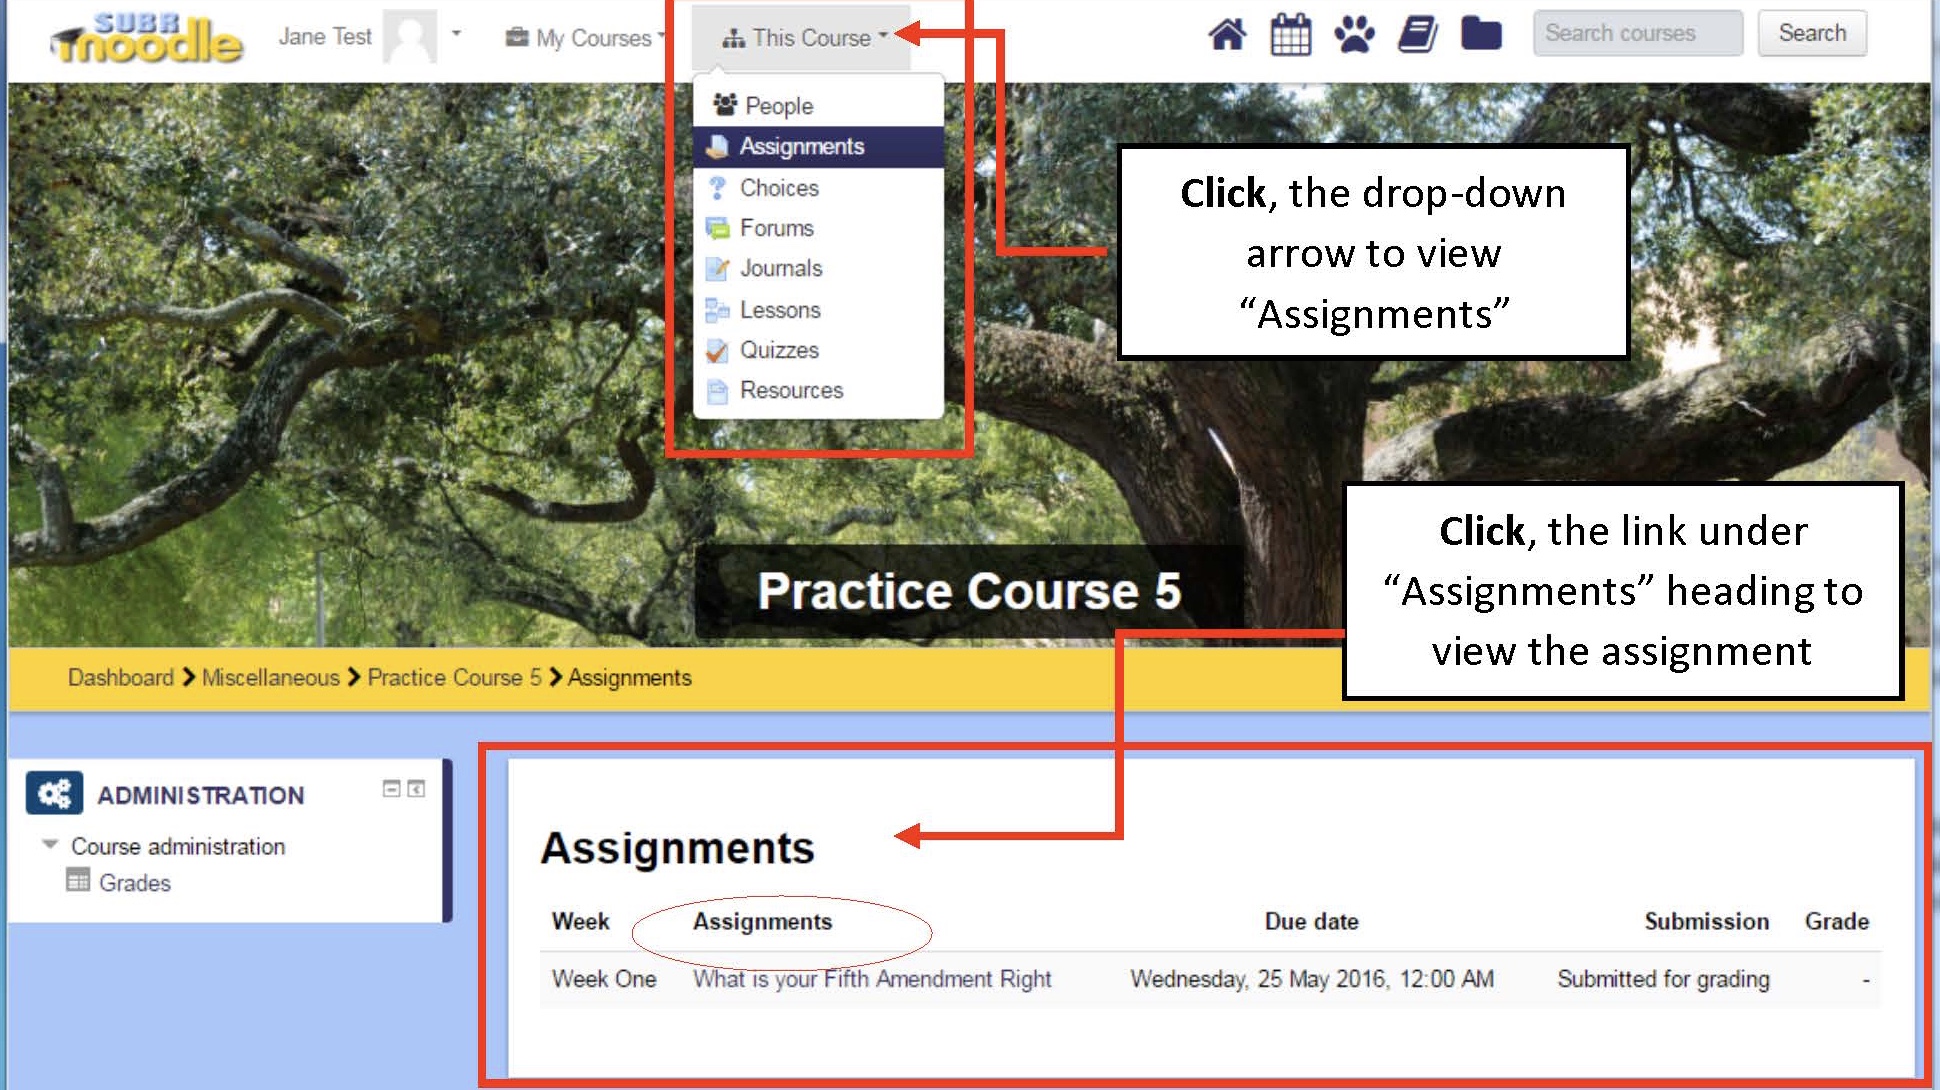
Once in a course, locate “The Course” drop-down menu on the top of page outlined above in red.
- Click, the drop-down menu arrow that’s located to the right of “The Course”
- Highlight and Click “Assignments” link outlined above in
- To proceed, browse assignments in your course and click on the Assignments title link circled above in red\;
ASSIGNMENT FORMAT
In order to give you credit for your assignment, your instructor must be able to open and view it. In the case of word processed files, this USUALLY means saving in .DOC or .RTF format. If you are not using Word, use the Save As command in your word processor to save in .DOC or .RTF format. Of course, you should verify the format required by your instructor for each course.
NAMING YOUR FILE
To prevent possible problems, use only alphanumeric characters (letters and numbers only) when naming your files. Avoid using special characters such as # or %. Moodle will replace these characters with an underscore when you upload the file.
Note: There may be other assignments that are not yet available but will become visible later in the term. Be sure to read all instructions in the syllabus and in your course, and check Moodle often to ensure that you don't miss any assignments.
Taking Test and Quizzes:
Step-by-Step Taking Test and Quizzes Instructions:
To begin taking Test/Quiz, you will need to go into a course. (Please read Step-by-Step Accessing Course)
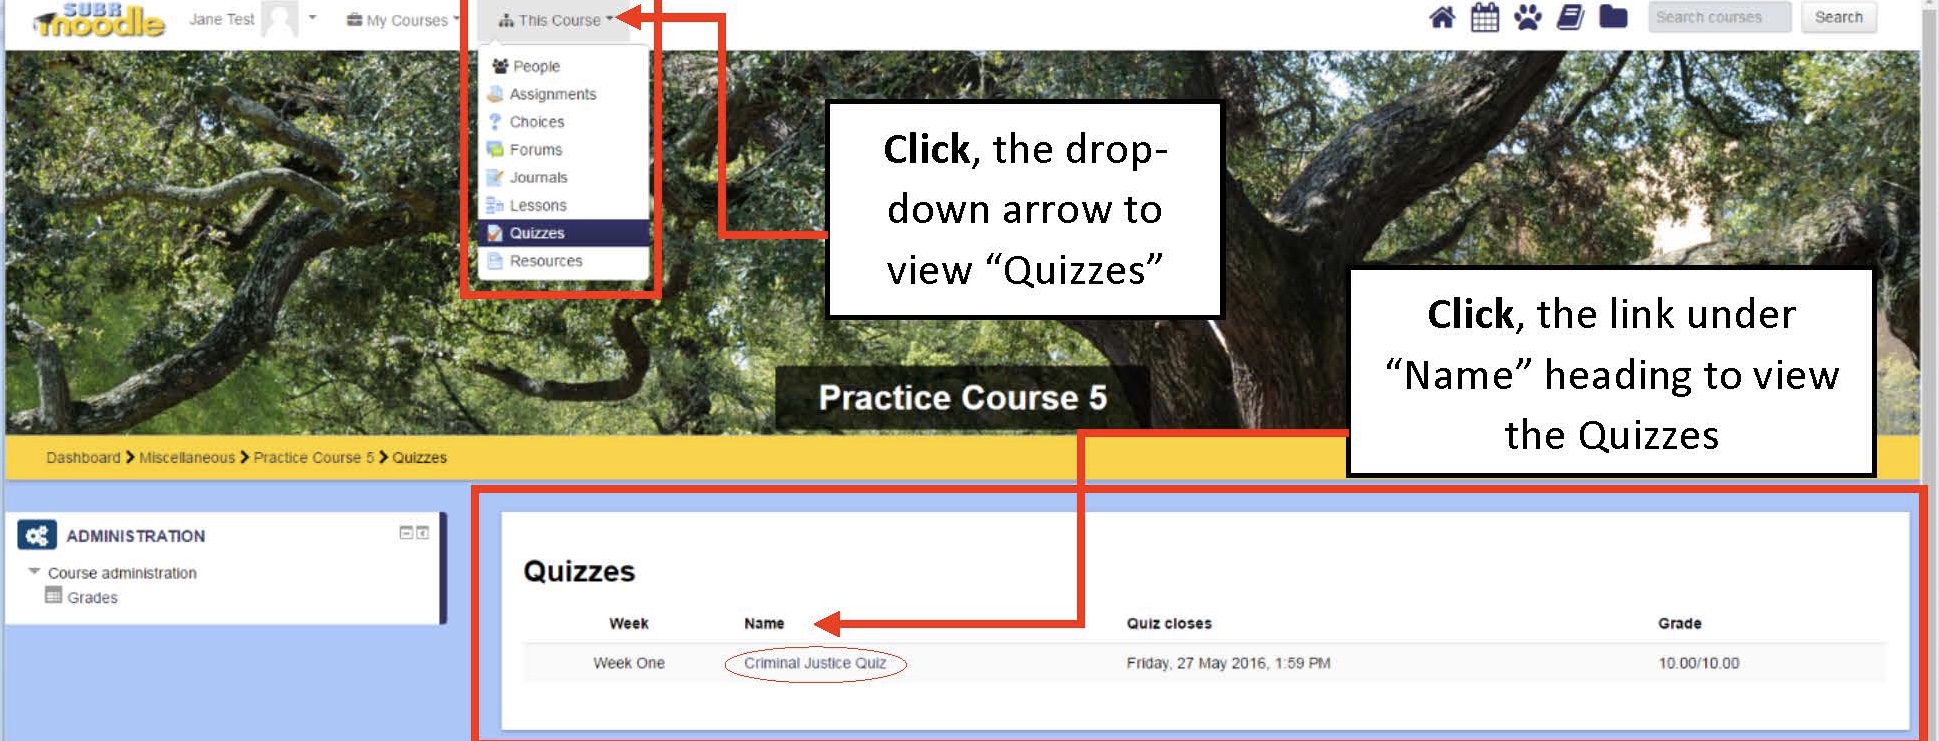
Once in a course, locate “The Course” drop-down menu on the top of page outlined above in red.
- Click, the drop-down menu arrow that’s located to the right of “The Course” menu.
- Highlight and Click “Quizzes” link outlined above in red.
- To proceed, browse for available Quizzes in your course and click on the quiz title link circled above in red.
- Click on the Attempt quiz now button circled in red below.

- Proceed by selecting or entering the best answers to the questions.
Note: Your instructor can set the quiz to display all questions on one page or to display them one at a time. If the questions appear one at a time, use the Next button (or click on a page number) to move from question to question.
- If there are a lot of questions, periodically click on the Save without submitting button near the bottom of the page to help ensure that your answers are saved in case of a technical problem.
- When you have completed all the questions, click on Submit all and finish and click on OK to confirm your submission.
Checking Grades:
Step-by-Step Checking Grades:
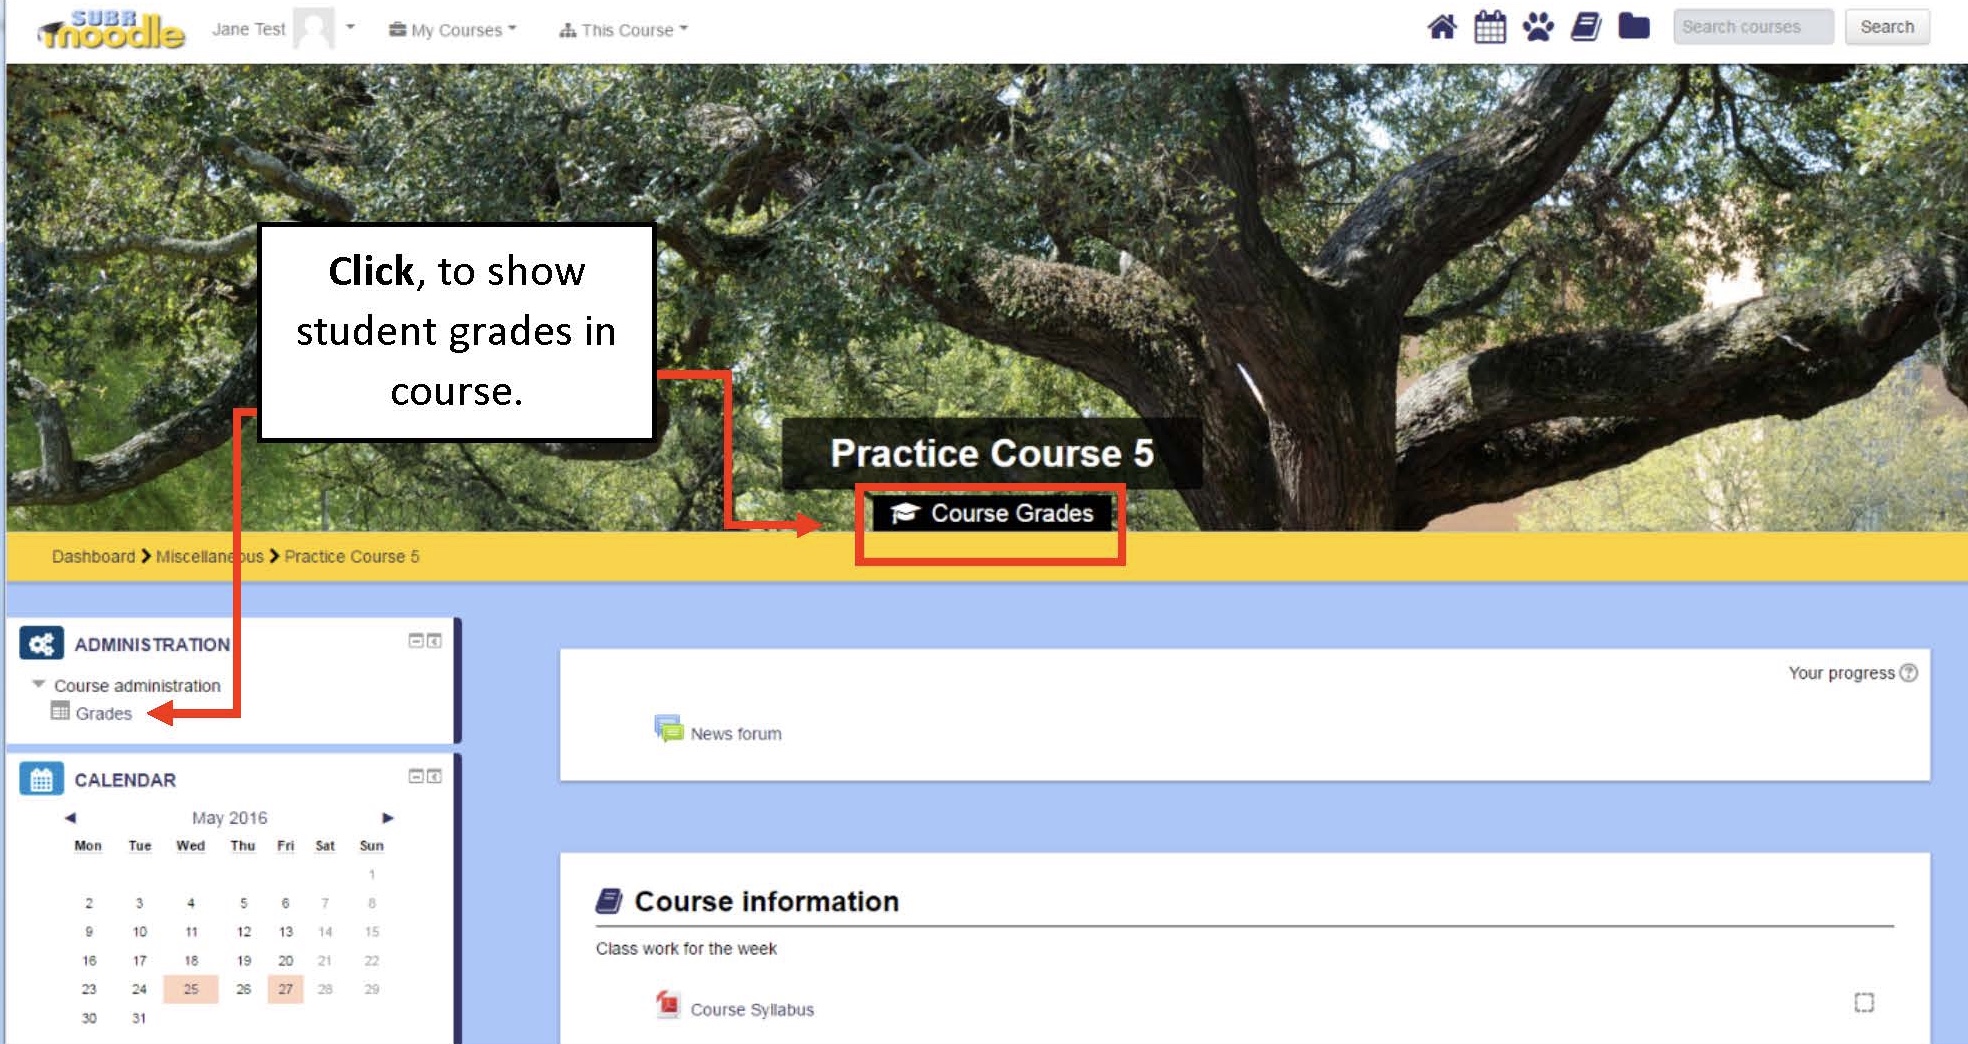
To begin checking your grades, you will need to go into a course. (Please read Step-by-Step Accessing Course)
There are two ways to access your grades: Click, “Course Grades” slider or “Grades” in the administration block outlined in red.
Respond To Forum:
There are several different types of forums. Forums can be set to work differently by your instructor:
- You may be asked to participate in an ongoing discussion where anyone can start a new topic and others can reply.
- A forum may have only one topic, and students can post replies, but can't start new topics.
- Forums may be used for private journals (where each student sees only their own posts), or for open journals (when you can read other student's posts but can only write on your own page).
- When forums are assigned for group work, you may be able to read another group's discussion, but not post to that discussion.
- Only instructors can post to the News Forum for a course, and replies are not allowed.
Step-by-Step Posting to Forum:
To begin posting to a forum, you will need to go into a course. (Please read Step-by-Step Accessing Course)
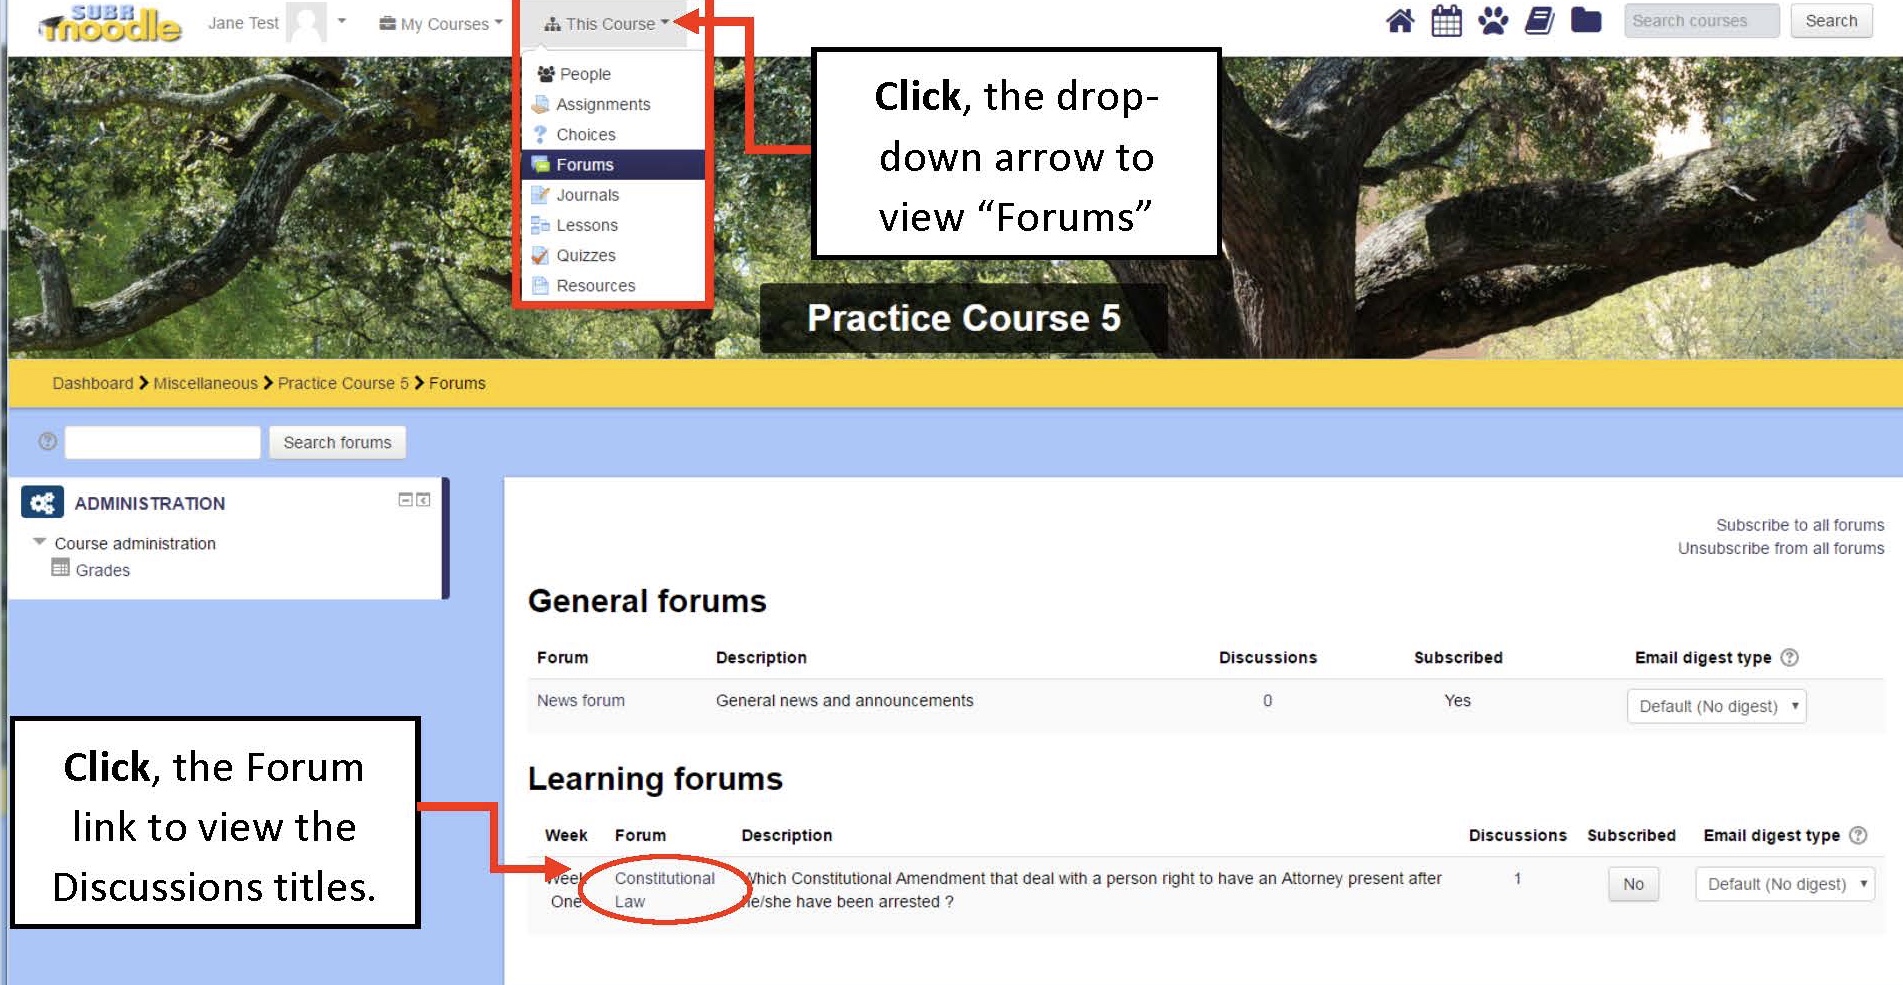
- Click, the drop-down menu arrow that’s located to the right of “The Course”
- Highlight and Click “Forums” link outlined above in
- To proceed, browse for available Forums in your course and click the link to a forum circled above in red.
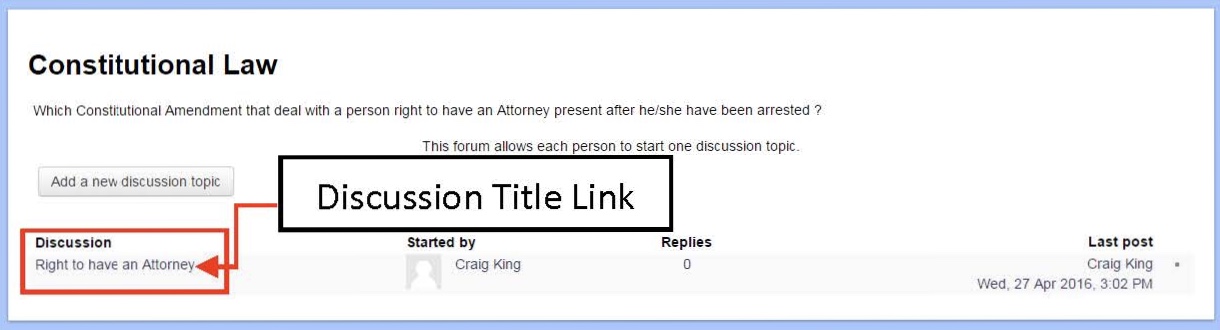
- Depending on the type of forum, you may be able to start a new topic, or only reply to a previous post or discussion
- Click a Discussion title outlined above in red (not the class member’s name) to open and read what has been posted so far on the discussion. If there are already discussions started, you will see a list on the “Forum” page. For single-topic or blog-like forums, there is no table listing Discussions. Posts are simply displayed on the “Forum” page.
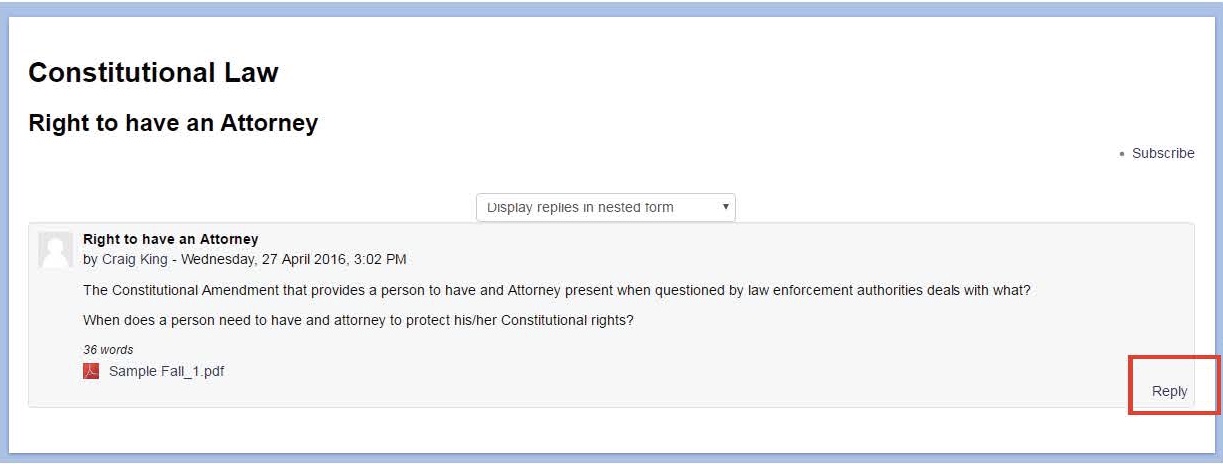
- Click Replay to a response that's outlined in red above.
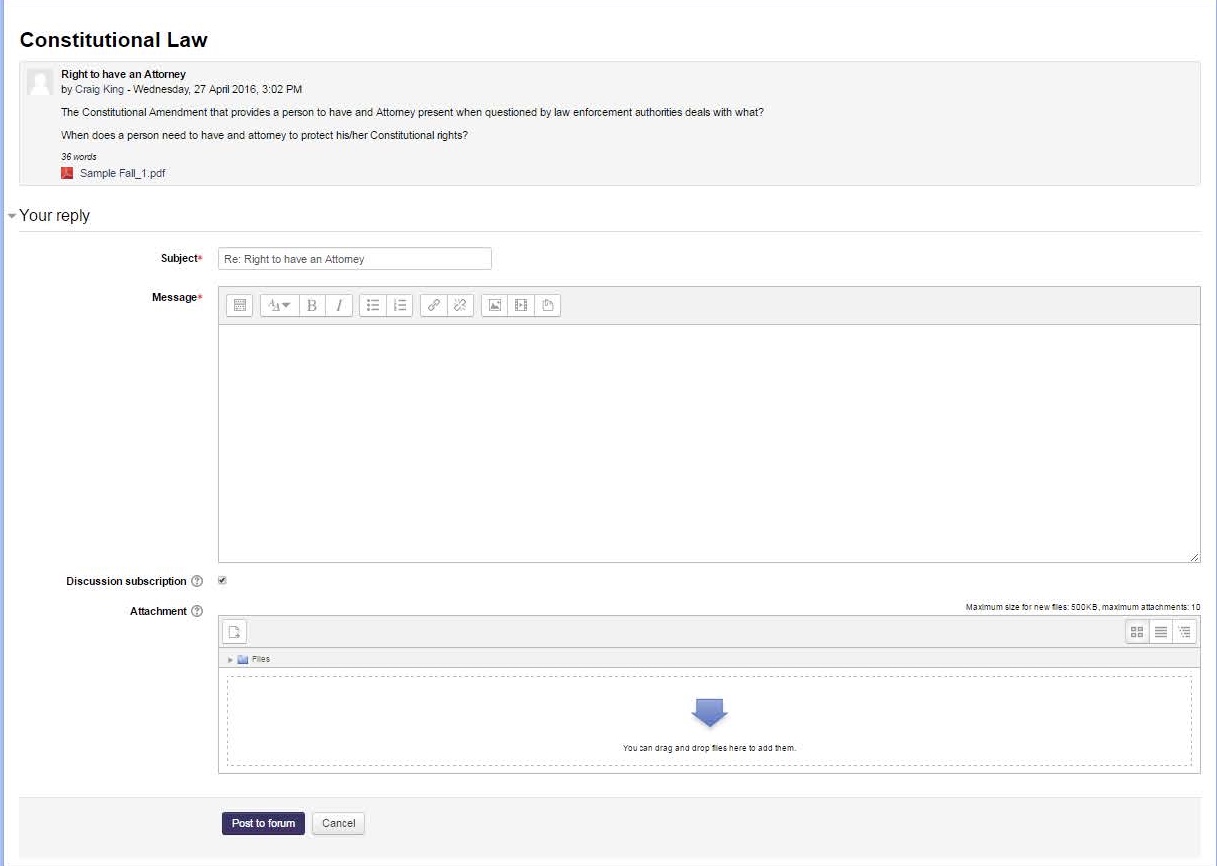
- The Your reply or Your new discussion topics page shown in the screenshot above opens.
- In the Subject field (required), type a brief but descriptive subject line.
- In the Message field (required), enter your new topic or reply. Use the HTML Editor toolbar to format text and images, links to media, or equations.
- Too add an Attachment to your post, drag and drop the file into the upload area (denoted by the blue arrow). You may also click Add and then choose your file using the File picker.
Note: Image files attached to a post will display below tour post, but other files types will have to be downloaded to open.
-
When your post is complete, click Post to forum to submit.
Note: After you post a topic or reply, you have 30 minutes to edit or delete your post before the post is locked for editing and an email is sent to any subscribers.